What you need to draw is neither very costly nor follows: First, keep handy paper that will be useful not only to draw, to pull the brushes and try out new design.

1. SOFT (B, 2B) , through which you can get a very heavy black line;
2. MEDIA (HB) ;
3. HARD (H, 2H) , particularly suitable for technical drawings.
Who wants to learn to draw must first become familiar in the use of this instrument, according to the picture you want to run you can choose the pencil hardness. Typically, the designer uses only experienced two pencils, a soft and a hard artistic designs for technical drawings. Their use depends on the hand of the artist or the pressure that we give to the drawing section.
Try them all and, depending on your needs, choose the one that seems most appropriate. The tip however, must be perfect: a perfect point and helps to properly draw the best of your ability. Therefore, you need a good sharpener rotation. It 'also good to keep a small piece of sponge to clean up the mine before starting to use it because, after being sharpened, it will also remained dirty with dust.
With these simple precautions will prevent problems that could ruin the design.
b) RUBBER
Draw also means the erasure of rubber is very important, must be of good quality and must be kept constantly rubbing it on a clean piece of cloth.
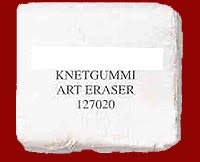
 The most suitable is the BREAD RUBBER: Rubber is a very soft and pliable, good to quickly delete and remove stains and traces of pencil from the paper.
 The putty can help lighten the shades, using it as a buffer and pressing very gently on the affected area, making sure that before each infill is clean. In addition, it can be used to achieve special effects erasure expressive drawings already done.

